
Here at Kumbartcho over the last 10 years I have created a number of shade tunnels for gardening.
Primarily containing wicking beds.
Some of these are in the local community gardens. Here I learned some of the how to, & how not to of shade tunnels, & wicking beds.
The web site where I got my plans for both, no longer exists, so I thought to “fill the space!” so to speak.

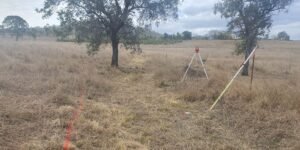
Above is one of my early learning experiences.
The beds along the edges are built with corrugated iron sheeting surrounds, shade cloth liner, builders plastic liners, & star pickets. All this with a timber edge where you’ll be working just to take the sharp edges off the iron, & star pickets.
I’ve since scrapped this design as too labor intensive, resource hungry, & not long lasting! {the builders plastic breaks down from UV’s, & is easily punctured below ground!
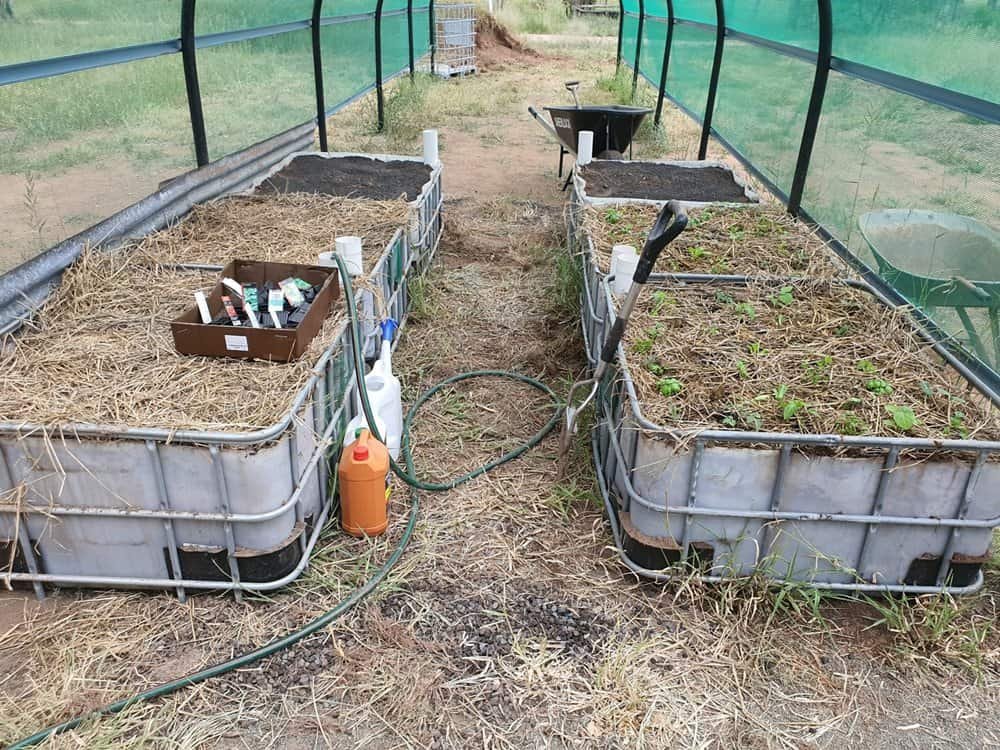
My new design for the beds is to use IBC”s, cut in half.
In these I put 90 mm pvc diagonally across the bottom, with a riser coming up in the corner next to the walk way.
The pvc has 45 mm holes drilled with hole saw along the bottom to facilitate filling.
Hose goes in, as in picture, to the riser pipe when filling.
I then cover the pvc in the bottom of the beds with “builders mix” (sand & gravel), sourced from a concrete batching plant.
I then fill with good soil mix.
Of course then mulch it, mulch it!

To protect the IBC plastics, I have sheeted this tunnel with corrugated iron along sides, & ends.
This keeps the sun off for longer life.
This tunnel is narrower than others I’ve built, & has not required props in center of bows.
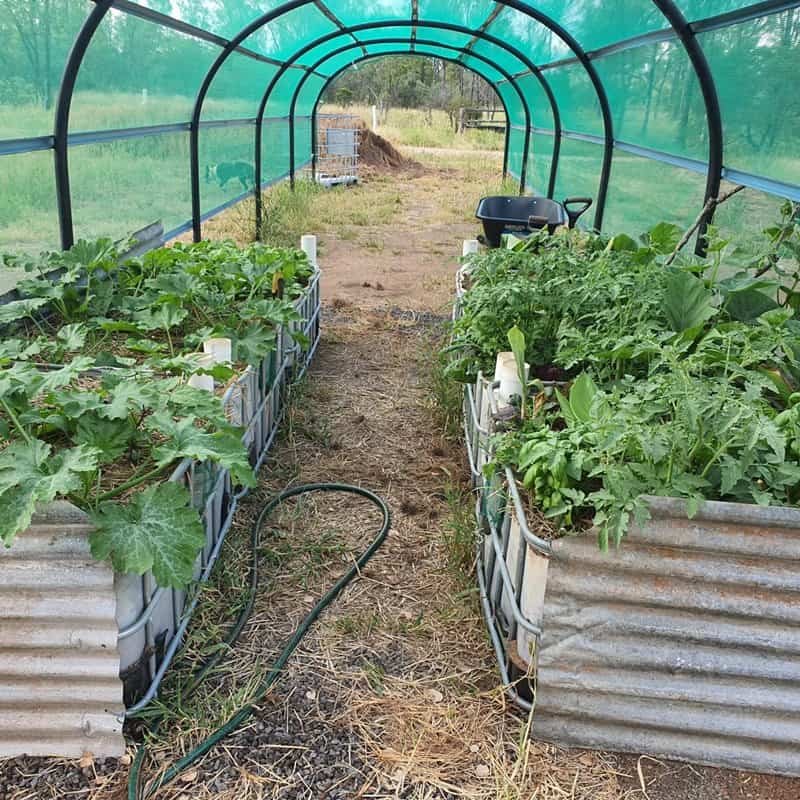
This tunnel is designed for 2 beds, & access with wheel barrow down the center.
I found this a very workable design.
Bows are made with 2″ rural poly pipe, which pushes over 5″6″ star pickets.
The stability, & strength of the tunnel structure comes from the top hat ceiling battens, which are tech screwed onto the poly pipe.

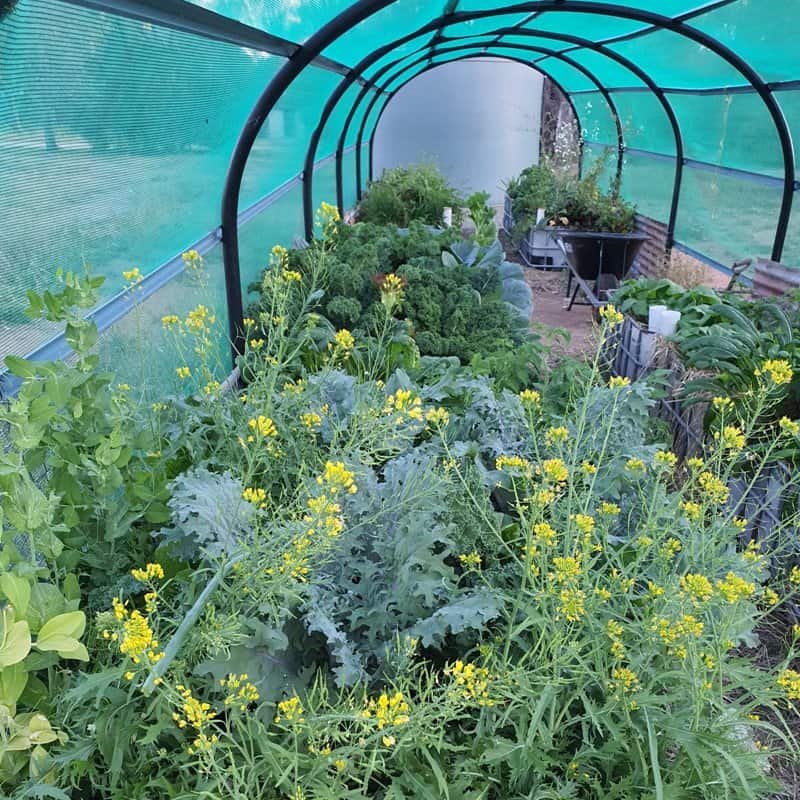
Now you’ve seen the abundance, here’s the specifications.
1 x 50 metrex3.5 meter roll of 30% shade cloth.
Enough for 2 x 12 meter long tunnels.
This I buy on line as none of the hardware shops stock 30%.
30% is all you require (believe me!)
Next is 14 x 5’6″ star pickets.
28 pickets if you’re building 2 tunnels!
Then there’s the ceiling battens.
These seem to come in just over 6 meter lengths, & you’ll require 14 per tunnel + 1 more to cut up for clamping the shade cloth on.
That’s 30 battens for 2 tunnels.
Teck screws for fastening battens to poly bows, & fastening shade cloth clamping bits on.
12G x 20 mm hex head metal Teck screws x 300 for 2 tunnels.
To clamp the shade cloth to the end poly bows I cut 100 mm pieces of 2″ poly, & split down one side. This then can be forced over the shade cloth & end bows.
1 between each of the ceiling battens.
100 meters of 2″ rural poly pipe.
Tunnel dimensions.
12 meters long x 4 meters wide.
2 meters between bows.
Bows are made with 7 meter long lengths of poly.

Showing poly clamps on end bow to fasten shade cloth.

Chook composting tunnel.
These 4 meter wide tunnels require props under every 2nd bow.
I use 90 mm pvc, & fill with crusher dust, with crystals, bottle of Biodynamic Australian Environmental Activator, Crystals, & etc making them into “towers of power!”

Chook green tunnel.

Clamping shade cloth to battens.